- Joined
- Oct 28, 2015
- Messages
- 1,645
- Reaction score
- 8
I tried my hand, finally, at doing a silver wire inlay on wood today.
I have the wire in the wood and its soaking in spit and water to lock it in
as I write this.
It took me quite awhile to gather tools, ideas, and confidence enough to try.
But, those darn inlays on stocks are SO purty. I knew I had to give it a go and
see if I had any potential at all.
So, this is kindergarten, baby steps... If you really know your stuff? Please,
don't laugh. But, I can't be the only unskilled BP lover here so someone might
be interested in the remedial level.
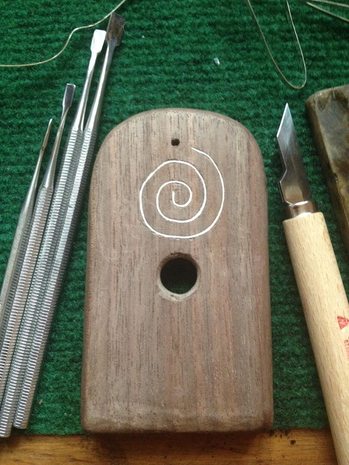
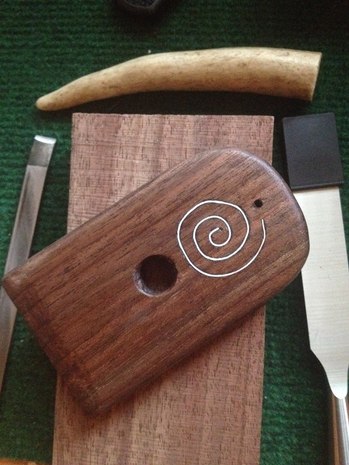
I decided to work on the shooting block I made using only a furniture scraper, drill,
and a nice piece of walnut I bought as scraps from Clay Smith. For 15 bucks, he'll
send a box of nice hard wood scraps from his rifle making.
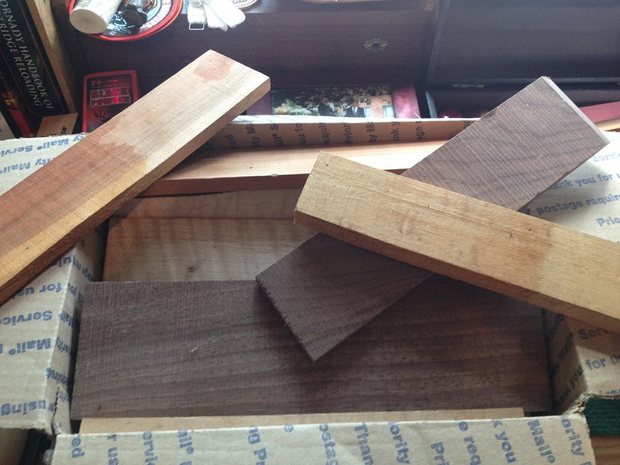
Nice Box of Rifle Stock Scraps From Clay Smith
I got walnut, cherry, maple, and oak to play with. I have been using these pieces to test stains,
new carving skills, grits, and now inlays before daring to touch a real rifle blank.
I found a couple videos on Youtube made by Paul Hamler that I found helpful.
If I can follow them, you can be sure they are good for the beginner. I am using a mix
of newly purchased and borrowed tools. My friend Herb loaned me some of his.
Once I knew I was ready to try, I had to select a design. I wanted to pick something related
to my family roots. I needed to keep it really simple. A lot of the nicer stuff goes way beyond a
simple uninterrupted line of wire. Finding a good design was more difficult than I anticipated.
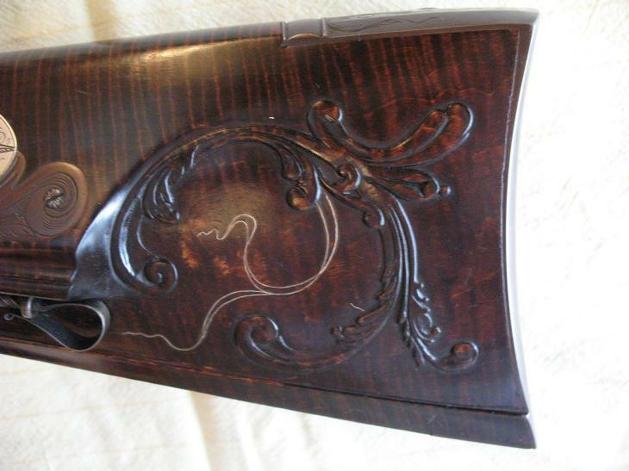
After a while, I settled on an ancient symbol carved into stones in Ireland. I have traced roots to near
the the location these were found. I avoided some of the more complex celtic designs. This is what I
based mine on.
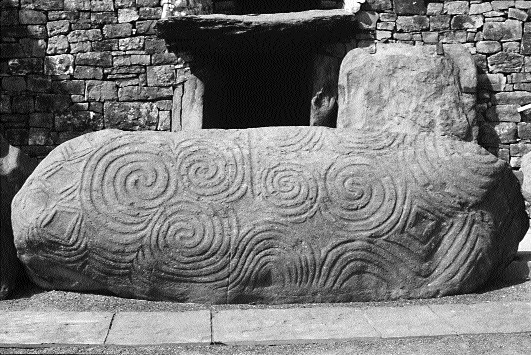
Ancient Irish Stone Carvings
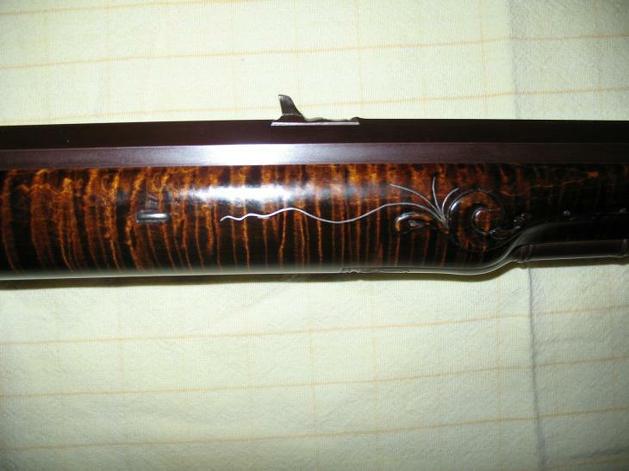
Below is a pic of the wood as I wait for the wire to lock in.
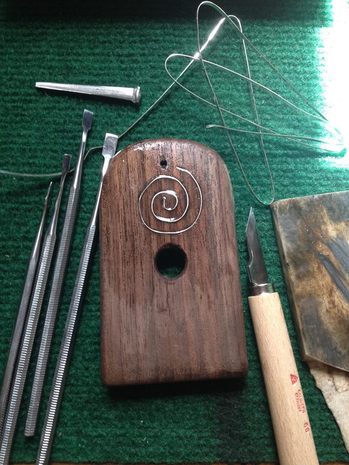
A Beginner's Inlay Based on Ancient Irish Stone Carvings
I learned quite a bit doing this and am quite confident that my next effort will be more under my control.
The selection of such a forgiving design was a very helpful thing for me. The lines did not need to be perfect
for it to remain valid. This allowed me to learn, accept, and move more surely.
If you use the video? I had to use light mallet strikes to go deeply enough into the wood. I could not simply
use my hand strength like Mr. Hamler did. I also did not make my own tools like Mr. Hamler did. So, that might
be the difference.
If there is an interest, I will show the result. I still have work to do.
I have the wire in the wood and its soaking in spit and water to lock it in
as I write this.
It took me quite awhile to gather tools, ideas, and confidence enough to try.
But, those darn inlays on stocks are SO purty. I knew I had to give it a go and
see if I had any potential at all.
So, this is kindergarten, baby steps... If you really know your stuff? Please,
don't laugh. But, I can't be the only unskilled BP lover here so someone might
be interested in the remedial level.
I decided to work on the shooting block I made using only a furniture scraper, drill,
and a nice piece of walnut I bought as scraps from Clay Smith. For 15 bucks, he'll
send a box of nice hard wood scraps from his rifle making.
Nice Box of Rifle Stock Scraps From Clay Smith
I got walnut, cherry, maple, and oak to play with. I have been using these pieces to test stains,
new carving skills, grits, and now inlays before daring to touch a real rifle blank.
I found a couple videos on Youtube made by Paul Hamler that I found helpful.
If I can follow them, you can be sure they are good for the beginner. I am using a mix
of newly purchased and borrowed tools. My friend Herb loaned me some of his.
Once I knew I was ready to try, I had to select a design. I wanted to pick something related
to my family roots. I needed to keep it really simple. A lot of the nicer stuff goes way beyond a
simple uninterrupted line of wire. Finding a good design was more difficult than I anticipated.
After a while, I settled on an ancient symbol carved into stones in Ireland. I have traced roots to near
the the location these were found. I avoided some of the more complex celtic designs. This is what I
based mine on.
Ancient Irish Stone Carvings
Below is a pic of the wood as I wait for the wire to lock in.
A Beginner's Inlay Based on Ancient Irish Stone Carvings
I learned quite a bit doing this and am quite confident that my next effort will be more under my control.
The selection of such a forgiving design was a very helpful thing for me. The lines did not need to be perfect
for it to remain valid. This allowed me to learn, accept, and move more surely.
If you use the video? I had to use light mallet strikes to go deeply enough into the wood. I could not simply
use my hand strength like Mr. Hamler did. I also did not make my own tools like Mr. Hamler did. So, that might
be the difference.
If there is an interest, I will show the result. I still have work to do.