- Joined
- Oct 28, 2015
- Messages
- 1,645
- Reaction score
- 8
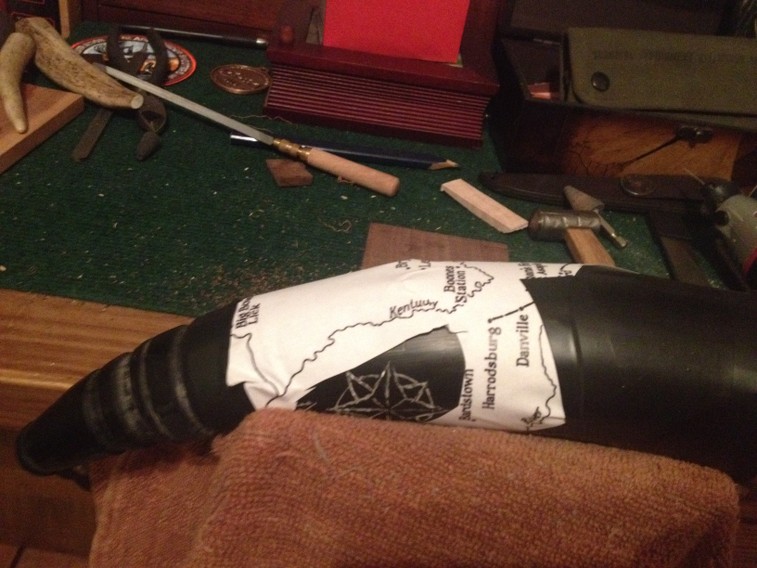
I was out looking for leather straps when I stumbled on a bin with a large horn.
I had been having some success with carving so why not try scrimshaw, too?
The price was reasonable so I decided to bring it home.
Totally accidental.
When I got home, I looked to the great guru for help :bow: the internet.
I discovered I had goofed. The horn I bought was black. Scrimshaw needs
white horn. I decided that since I now had a horn I could not practice scrimshaw on?
I would attempt to build my first powder horn. No, I had no clue how to begin.
Totally accidental. (LATE EDIT: Later in this thread we discuss White India Ink and the scrimshaw is back on.
It is just gonna be tried on a complete horn.)
The Trouble Starts
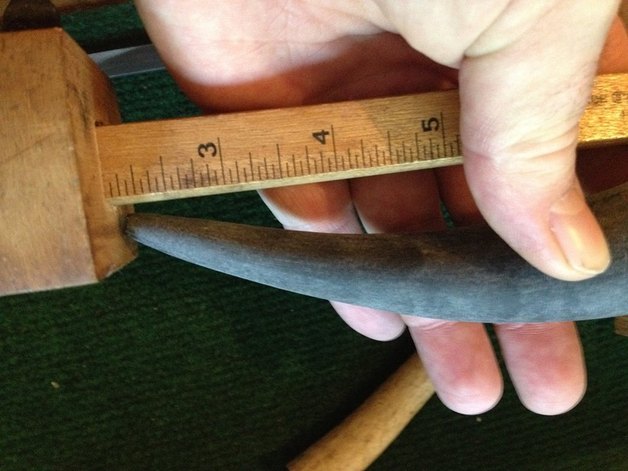
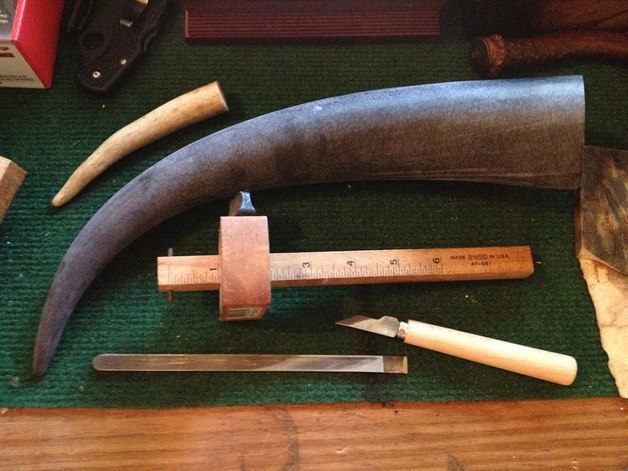
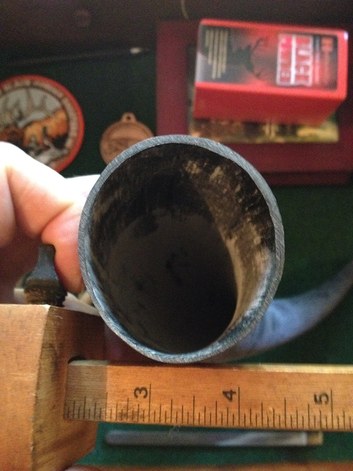
Taking Its Measure
Wondering What the Heck I Have Done
I watched some videos, did some reading, looked at some pictures, said a prayer, and began.
The first thing I did was to try cut the tip of the horn off and drill the spout hole.
Apparently, this is when a lot of horns are ruined. And, I did have trouble. My horn was solid
much deeper into the length of the horn than normal. In fact, it was longer than my drill bits. Plus, the
combination of the extra length and the curve meant that drilling a straight line to the cavity was a problem.
The recommended measurements for how much to cut off the tip were way off for this horn. I almost ruined it.
But, a second cut made drilling possible.
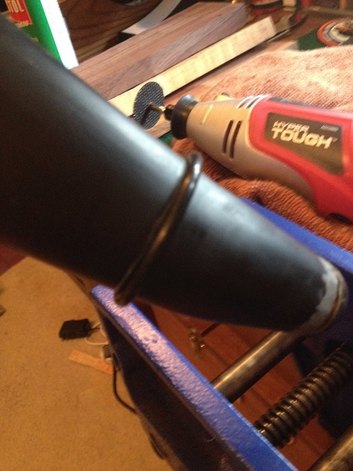
Sorry Its Blurry
I had to find a way to steadily mark the horn for cutting. I used O rings and a white wax pencil.
Those O rings were also a big help to me as I used the Hyper Tough (Dremel knock-off) to etch
the horn and make a start for the files.
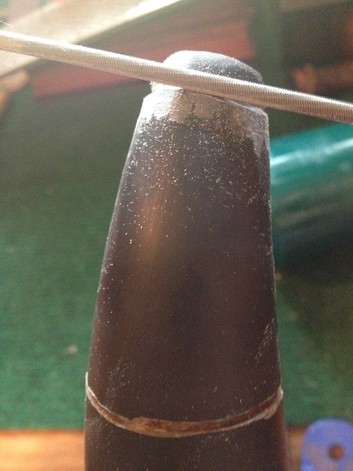
One of Several Files I Used
I used a furniture scrapper a LOT. When I tried to move faster with bigger more powerful tools,
I always made it worse and had to work to correct my haste.
I also wasted a lot of time polishing the surface to see how it looked.
So not necessary. (But, fun) I found the attachment below to be helpful if I
was careful. But, even then, I had to sand/scrape/buff a lot after.
The Horn Became White As It Was Worked
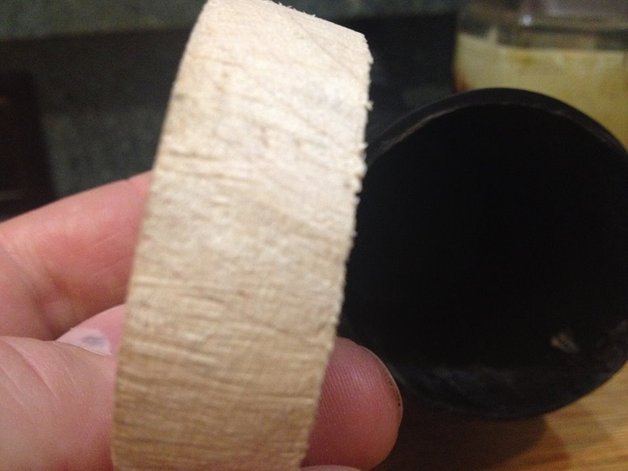
The reading I did told me the next step was to carve an inner plug out of pine. So, I did.
I threw that pine plug away. It fragmented under the files. I grabbed a piece of maple instead.

Maple Is Fun
When I was satisfied, I boiled the horn to make it capable of becoming more circular at the base and
be able to shape it to my plug. I literally changed its shape. Temperatures in a boiling pot are around 220,
but I was still careful to watch it so it would not melt. This was complicated by the fact that horn has 'memory'
and will try to return to its original shape when it cools. If your plug is too big, the horn will bulge and even split.
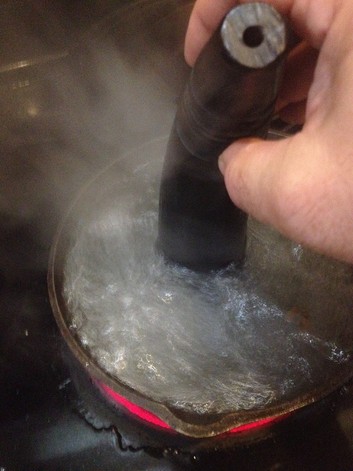
Caldron Boil and Bubble - This Was Done While the Wife Was Away (recommended practice!)
For those who do not know, horn and antler are just a kind of hair. Boiling it, sanding it, cutting it?
It smells like burning hair. Anyone with a nose is likely to object to being in its presence for good reason.
Add the smell of epoxy and being in the kitchen? (Chuckle) Some interesting discussions are possible.
I recommend ventilation and solitude or bribery (Flowers? A dinner date?) for a happy household.
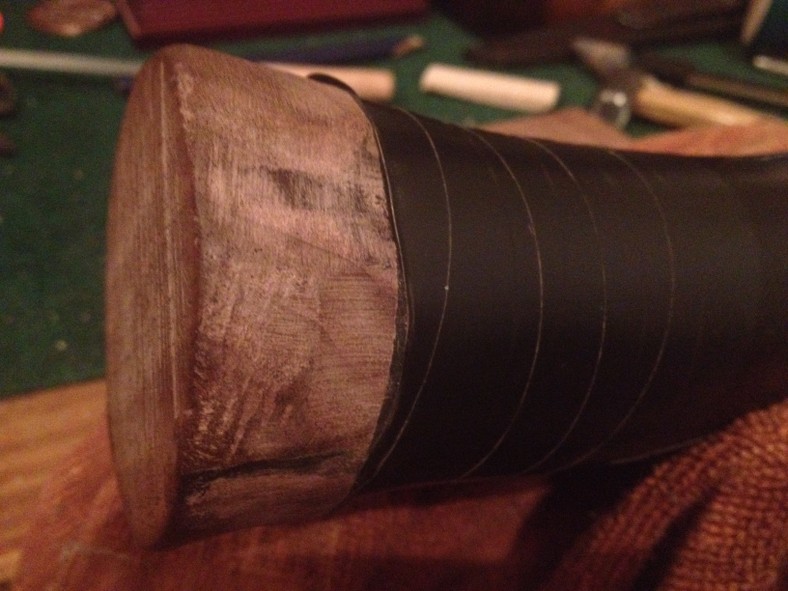
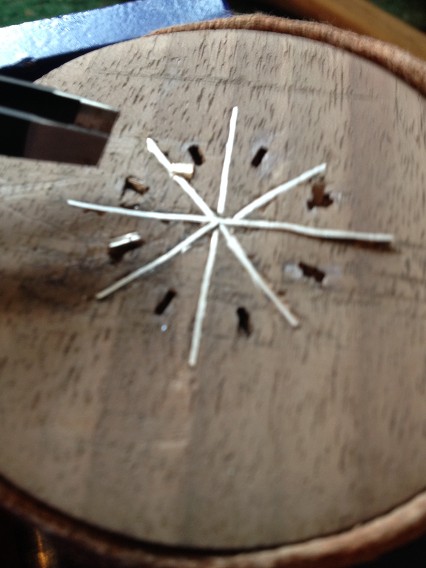
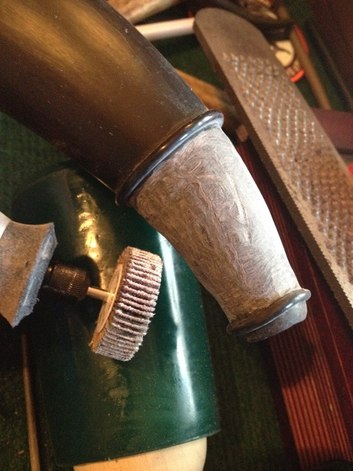
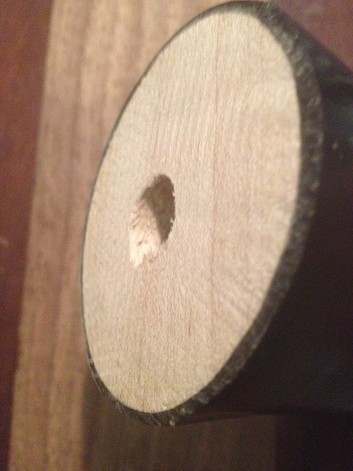
The Plug Has to be Bevelled
The cast iron was useful because when you tap the horn against the side it was heavy enough
to feel when the horn became malleable. When I thought it was ready, I used a rubber mallet to
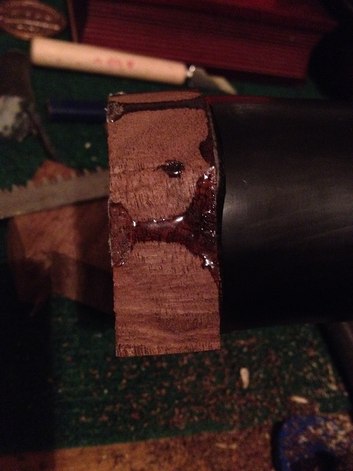
seat the maple plug into the horn. I also used a 1 hour heavy duty epoxy.
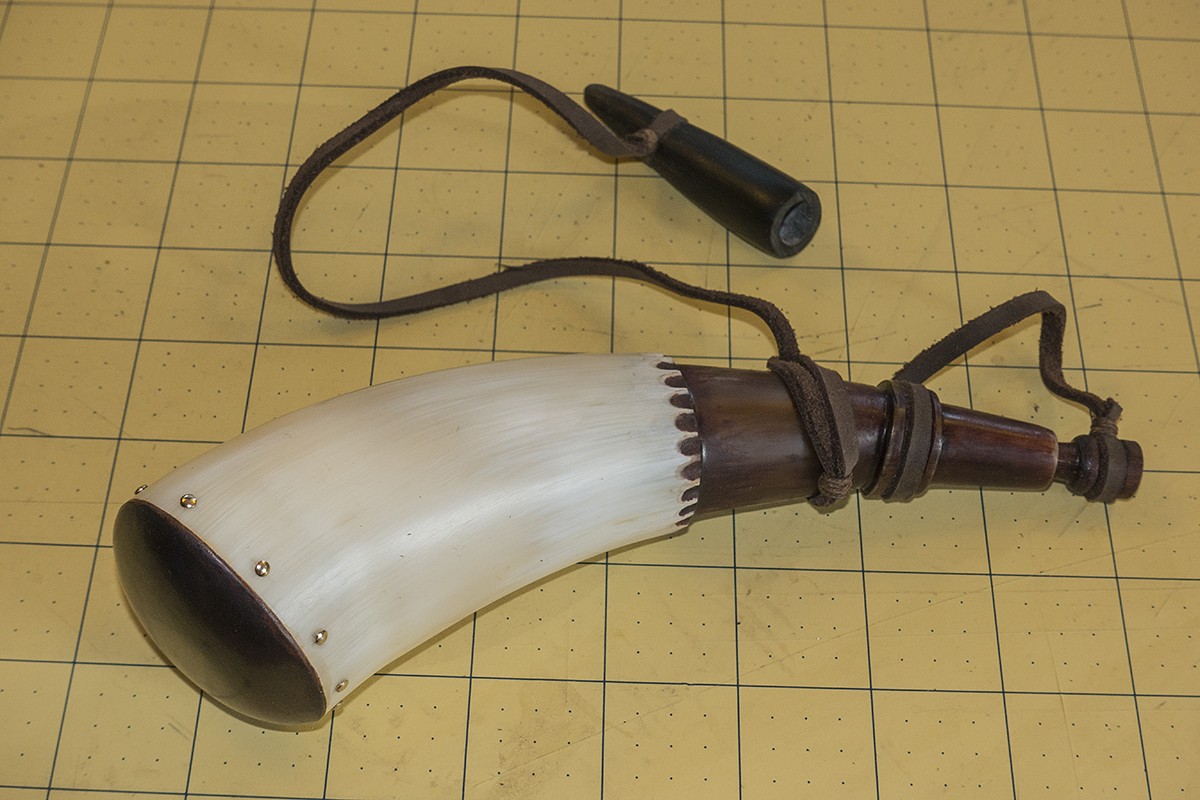
Getting Close
It is recommended that you cut a larger hole to lower weight and increase powder capacity.
But, it is not necessary. I only drilled a smaller hole because I wanted more surface for the epoxy to adhere to.
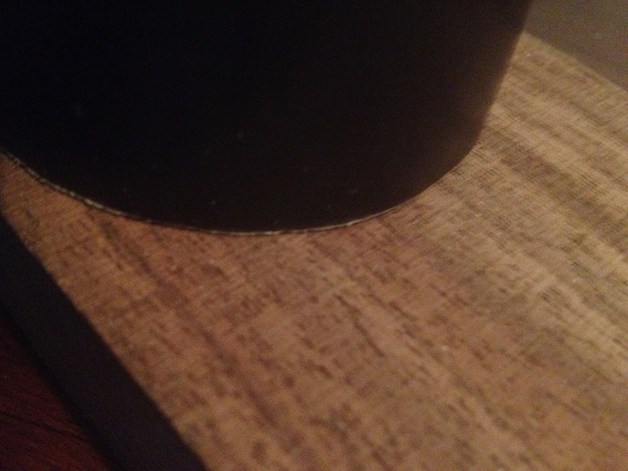
Checking to Be Certain It Is Even
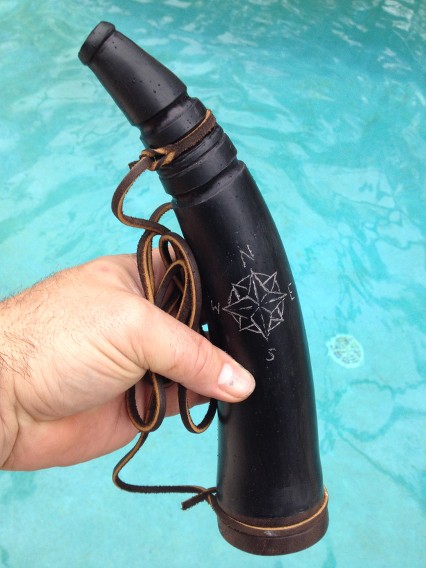
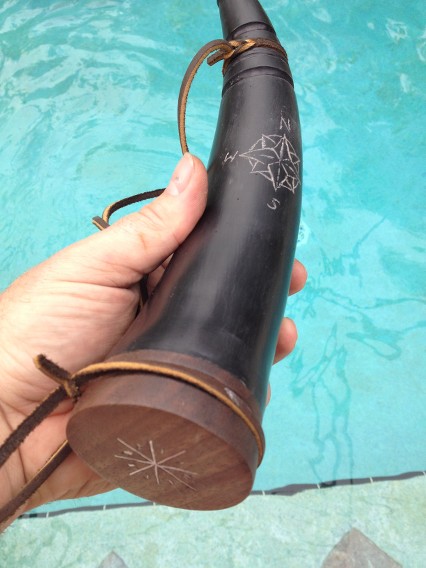
I chose a nice piece of walnut for the outer butt of the horn. It is drying now. I obviously have some carving to do.
I ran the grain of the walnut opposite of the length of the horn. That or parallel grains are recommended for the best look
when installing the outer plug.
Tune In Later to See If I Pull It Off
:Questuon:
I had been having some success with carving so why not try scrimshaw, too?
The price was reasonable so I decided to bring it home.
Totally accidental.
When I got home, I looked to the great guru for help :bow: the internet.
I discovered I had goofed. The horn I bought was black. Scrimshaw needs
white horn. I decided that since I now had a horn I could not practice scrimshaw on?
I would attempt to build my first powder horn. No, I had no clue how to begin.
Totally accidental. (LATE EDIT: Later in this thread we discuss White India Ink and the scrimshaw is back on.
It is just gonna be tried on a complete horn.)
The Trouble Starts
Taking Its Measure
Wondering What the Heck I Have Done
I watched some videos, did some reading, looked at some pictures, said a prayer, and began.
The first thing I did was to try cut the tip of the horn off and drill the spout hole.
Apparently, this is when a lot of horns are ruined. And, I did have trouble. My horn was solid
much deeper into the length of the horn than normal. In fact, it was longer than my drill bits. Plus, the
combination of the extra length and the curve meant that drilling a straight line to the cavity was a problem.
The recommended measurements for how much to cut off the tip were way off for this horn. I almost ruined it.
But, a second cut made drilling possible.
Sorry Its Blurry
I had to find a way to steadily mark the horn for cutting. I used O rings and a white wax pencil.
Those O rings were also a big help to me as I used the Hyper Tough (Dremel knock-off) to etch
the horn and make a start for the files.
One of Several Files I Used
I used a furniture scrapper a LOT. When I tried to move faster with bigger more powerful tools,
I always made it worse and had to work to correct my haste.
I also wasted a lot of time polishing the surface to see how it looked.
So not necessary. (But, fun) I found the attachment below to be helpful if I
was careful. But, even then, I had to sand/scrape/buff a lot after.
The Horn Became White As It Was Worked
The reading I did told me the next step was to carve an inner plug out of pine. So, I did.
I threw that pine plug away. It fragmented under the files. I grabbed a piece of maple instead.
Maple Is Fun
When I was satisfied, I boiled the horn to make it capable of becoming more circular at the base and
be able to shape it to my plug. I literally changed its shape. Temperatures in a boiling pot are around 220,
but I was still careful to watch it so it would not melt. This was complicated by the fact that horn has 'memory'
and will try to return to its original shape when it cools. If your plug is too big, the horn will bulge and even split.
Caldron Boil and Bubble - This Was Done While the Wife Was Away (recommended practice!)
For those who do not know, horn and antler are just a kind of hair. Boiling it, sanding it, cutting it?
It smells like burning hair. Anyone with a nose is likely to object to being in its presence for good reason.
Add the smell of epoxy and being in the kitchen? (Chuckle) Some interesting discussions are possible.
I recommend ventilation and solitude or bribery (Flowers? A dinner date?) for a happy household.
The Plug Has to be Bevelled
The cast iron was useful because when you tap the horn against the side it was heavy enough
to feel when the horn became malleable. When I thought it was ready, I used a rubber mallet to
seat the maple plug into the horn. I also used a 1 hour heavy duty epoxy.
Getting Close
It is recommended that you cut a larger hole to lower weight and increase powder capacity.
But, it is not necessary. I only drilled a smaller hole because I wanted more surface for the epoxy to adhere to.
Checking to Be Certain It Is Even
I chose a nice piece of walnut for the outer butt of the horn. It is drying now. I obviously have some carving to do.
I ran the grain of the walnut opposite of the length of the horn. That or parallel grains are recommended for the best look
when installing the outer plug.
Tune In Later to See If I Pull It Off
:Questuon: