Rotary Capper

Modern Muzzleloading Forum

Help Support Modern Muzzleloading Forum:

This site may earn a commission from merchant affiliate links, including eBay, Amazon, and others.
Howdy folks: Two Feathers here.
I apologize for the disruption in this rotary capper tutorial, but between my absentmindedness and a few other things, I lost track of what I was doing. I wasn’t sure if anyone really wanted to know how to make one of these, but after some contact with a few forum members, I was told that they do want to see how it’s done. So here we go! This is my take on it, so if you have a better idea please let me know.
I hope you can see the 2 different circles I’ve scribed into my 9 oz. scrap leather? The outer circle measures 1-1/2” in diameter, 1.5” for you machinist types. The inner circle measures 1.200”. I think to make it easier for folks without micrometers or digital calipers, you could get away with 1-3/16”? Anyway… there’s a small tab or ear on the outer circle. That has to be there, so don’t cut it off when you do the next step. After I get a little farther ahead, I’ll have more of this tutorial for you. If you have any questions or comments, just email me, [email protected]
Again, my apologies for the delay.
God bless:
Two Feathers
At The Mountain Man Emporium
cap_le10.jpg
 
Howdy folks: Two Feathers here again with more tutorial.
For this piece, you’ll need steel wing dividers (or a good drafting compass), a steel rule (or tape measure), and at least one 5/32” hole punch for leather. A rotary hole punch will work as long as it can punch 5/32” holes? My CCI caps are a bit larger than that, about .165” so try one of yours and if the hole is a little too tight, ream it with a nail set punch or a tapered piece of steel rod or wood until the cap fits snugly. You don’t want the caps falling out, but you don’t want the holes so tight that you can’t get the caps in either.
First, cut around the outer circle, being careful NOT to cut off that tab. After that, this is where it might get a little confusing, but it’s not that bad. As you can see, I’ve laid out dots on the inner circle. Those are where you’ll punch holes and cut slots for the caps. I have figured the layout for 9 holes, but we’ll only use 8 of them. If you want a different number of holes (caps), let me know and I’ll give you the number you need, BUT I’ll warn you, 8 is about as many as you’ll get without problems, I’ve made enough of these to know. First, set your dividers to an opening of .410” This is where a machinist friend comes in handy. If you have a good ruler, you can set it to 7/16”, but err on the short side. You’ll only be off by .027” and you’ll never notice that. Make your first mark on the inner circle, about ¼” to the Right of that tab or ear that you left ON the outer circle. After that, keep using your dividers to continue marking all around the circle until you have 9 points on it. The other marks you see are mistakes that I made while adjusting my dividers for 9 equal points. Your last mark should fall about 1/16” from the Left edge of that tab. Don’t worry, you’re not going to use it anyway. So if it isn’t exactly there, it’s not a tragedy. The important thing is that you have 9 marks and none of them fall where the tab is. You’ll see why shortly. Next you’ll punch a 5/32” hole on each mark, but only on 8 of them starting with the first one you made. Try to center the mark in the middle of the hole. This is where a drive punch comes in handy. You could buy just one off of eBay.
We’ll do the punching and cutting in the next part.
Note: This IS NOT as difficult as you might think. Look at the pictures and it will make sense. If you should have any questions email me [email protected] I’ll try to answer them the best that I can. After making one of these you’ll see how easy it really is.
God bless:
Two Feathers
capper10.jpg
 
hole_p10.jpg

Howdy folks:
 Two Feathers here with the next part of the rotary capper tutorial.
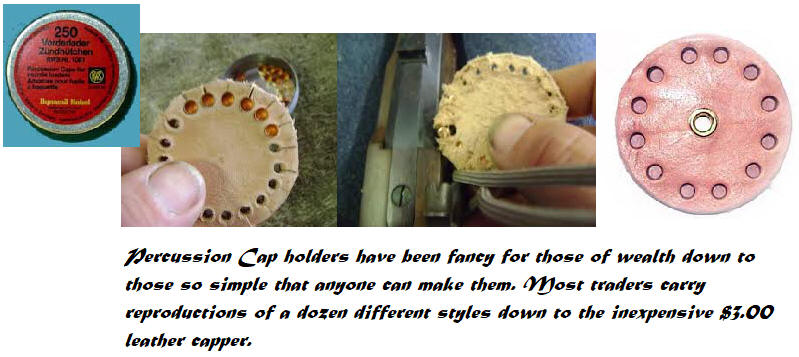
Here you can see that I’ve punched my holes around the leather disc. I’ve cut most of them just to show you how it looks. I left a few uncut holes (I guess I should have taken photos BEFORE I started cutting, but you get the idea) I’m trying to conserve web space (yeah… good excuse)! My punch is a .156”, but if I tap it a little harder than normal, it’ll make a hole about .160”, that’s ideal. You’ll also notice that NO hole falls under that tab. Since I cut a few, you can see why it’s important to start your lay out about a ¼” to the Right of that tab, NOT right under the tab. You’ll also notice why I said to only use 8 of the holes. If I used all 9 the last hole would be partially under the tab (see the little mark right below and to the left of that tab) and you would end up cutting off the tab when you made the slot.
 Oh… my middle hole is only 1/8” diameter, but you use whatever size fits your rivet and brass disc. I use 1/8” because I have a ton of 1/8” copper split rivets left over from attaching tags to our AKC registered hunting beagles. My father in law used to raise, train, and sell them. When he passed away I inherited all his tags and rivets, so now I have a bunch of them.
 Hopefully if you look at the one I sent Frontier Gander, you’ll see where this is headed? I’m not going to leave y’all hangin’ I’ll keep going until this project is complete. Thank you guys (and gals) again for your support on this project. It started out a little “rocky” if you’ll recall. I’m not getting back into that. Just thank you. There’ll be more… hopefully soon. In the next part, we’ll see how it all goes together and gets soldered. Hopefully, I haven’t forgotten anything up to this point? If you have questions just email me at [email protected]
God bless:
Two Feathers
 
Very nice tutorial. Thanks for posting it.  :Red tup:

Before the tutorial I thought there was a reservoir for the caps. I didn't realize that it just held 8 caps.
 
patocazador said:
Very nice tutorial. Thanks for posting it.  :Red tup:

Before the tutorial I thought there was a reservoir for the caps. I didn't realize that it just held 8 caps.
patocazador
You're very welcome. I'm sorry buddy but nope, just slots. I can give you any number of caps you want. You'll just need to let me know the exact size of your inner circle and how many holes (caps) you want to use. Of course the outer diameter will be a contributing factor? I make mine 1-1/2" O.D., anything larger gets cumbersome. You can make it ANY size you'd like. Have I deflated your interest in making one now? If I did, I'm sorry, but I'll never misrepresent myself or my products. Thanks again.
God bless:
Stoney
 
I know that I have never known how they could be built by hand. This thread has been an indispensable education for me.

I did a thorough search for information on building a rotary capper and could find nothing. Sure, I may have missed something, but it looks like Stoney1 is offering the only tutorial on the net.

Thank you for the information and tutorial!
Ron
 
I am new to this forum, and muzzle loading,  and this post is great,( other than the argument). I will build one of these soon. I will try cutting the brass circles with a hole saw. I know how difficult it is to put together a "how to" post and this one is excellent. Thank You
 
azal said:
I am new to this forum, and muzzle loading,  and this post is great,( other than the argument). I will build one of these soon. I will try cutting the brass circles with a hole saw. I know how difficult it is to put together a "how to" post and this one is excellent. Thank You
azal
 It's not done yet, there are 3 more posts before completion. Thank you for your kind words. I'm glad that it's interesting to the members.
God bless:
Stoney1
 
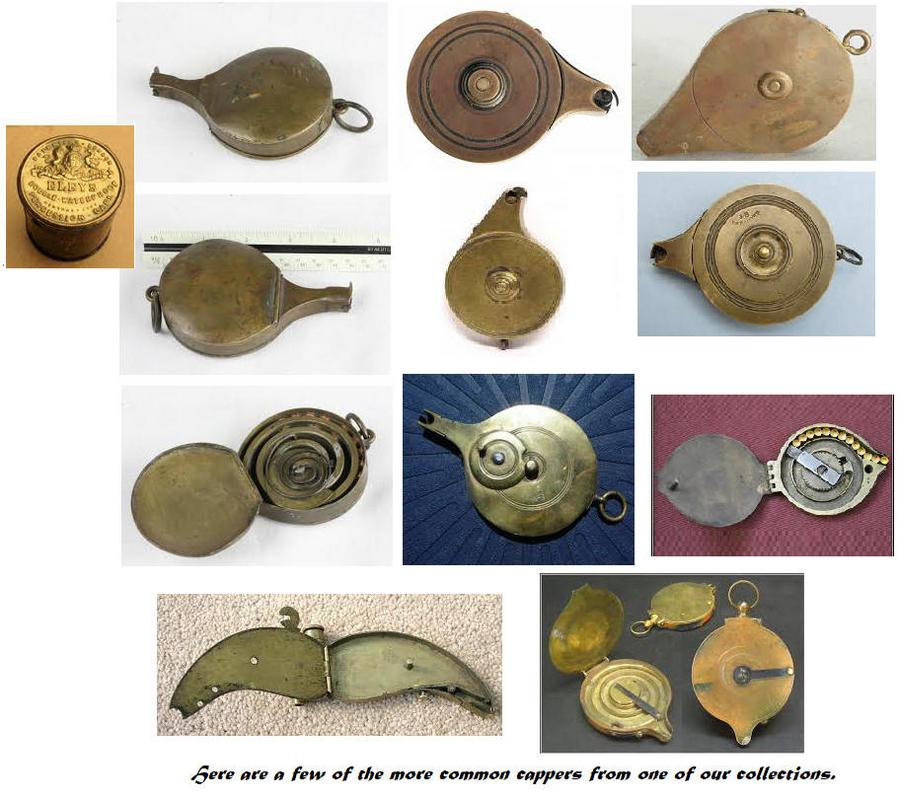
wow some of those contraptions look like they would be a headache to build!
 
Many of the manufacturers used craftsmen from other trades like silversmith and coppersmiths plus this was the age of invention (industrial age - machines). Inventions of anything one could think of were popping up everywhere.  I have a capper made back in the 1950's by a craftsman Lynn Candberry from Philadelphia, use to see him at Friendship on traders row, he sold cappers. Some look like Stoney's and like others seen today sold by TOTW, Log Cabin Shop, and most traders except just 60-65 years earlier. All these designs are from before the American Civil War, do a little research on European accessories and you'll see some really neat designs for percussion cap holders from different makers of firearms. I get a chance i'll show you a few pictures from one of Bannerman & Sons Catalogs, I have several of the 1930 to 1935 catalogs selling Civil War items, cappers included.
 
Buck Conner said:
Buck
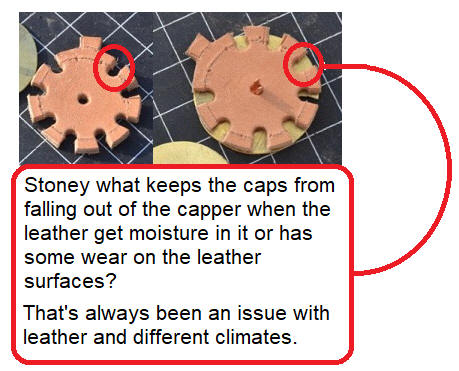
 Friction holds them in. If made properly, the friction of the hole and that slot that you cut to the hole will keep them put. Being that the slot is not perfect makes it just tight enough to keep the caps in. I know that over the years, it WILL loosen up, but a drop of water on each slot, a few hours before you want to load it with caps, will shrink the slot/hole just enough to tighten it back up. I can tell you this. I have the one that I made back in 1977 and (even though it barely gets used) it still holds 8-#11 caps just fine. I live in North East PA. and our climate is very diverse, but that doesn't seem to affect it?
Stoney1
 
Thats a big mistake that I found out last week lol. I made some simple leather cappers, cut the shape, punched holes, stained the leather and then found that the holes were to small once the stain dried lol. Live and learn.
 
FrontierGander said:
Thats a big mistake that I found out last week lol. I made some simple leather cappers, cut the shape, punched holes, stained the leather and then found that the holes were to small once the stain dried lol.  Live and learn.
Frontier
 Not sure what you're trying to say? Sorry. Are you telling me that my design is bad?  I guess I'm just a little "cornfused"? :?:
Dave
 
:scratch: no dave, I simply was stating that I once made the mistake of punching holes for a leather capper, then taking the mistake of dying the leather and finding out that the hole shrunk after it dried.

You mentioned using water to tighten up the holes once they loosen up over time.
 
FrontierGander said:
:scratch: no dave, I simply was stating that I once made the mistake of punching holes for a leather capper, then taking the mistake of dying the leather and finding out that the hole shrunk after it dried.

You mentioned using water to tighten up the holes once they loosen up over time.
Frontier
Sorry for the misunderstanding.
 Try this. Get a piece of 1/8" brass tubing (it measures about.160" on the OD... perfect.) and cut it into 1/4" long pieces with a mini tubing cutter, or whatever you have? Then, after you punch all your holes, shove a piece through each hole and out the back leaving an equal amount on each side. Next dye your leather and let it dry. Then pull out the brass pieces and coat the whole thing in Aussie Leather Conditioner or Mink Oil. Once that dries, the holes will stay the right size for years!
Dave
 
Back
Top