


WARNING! Lock parts may come hardened from the factory. Polishing may remove hardening, causing the parts to become weaker and prone to breakage over time.
Now lets move onto the lock! Be very very careful with that main spring guys! It will cause you a ton of pain should it slip from your grasp and fly off at your face or even worse, hit you in the knuckle. I use a small C clamp or heavy pair of channellock plyers and grasp the main spring and gently pull it from the lock plate. Once it has been removed, you can now safely remove the hammer, bridle and remaining lock parts. Be careful that you do not lose the FLY! Its a tiny piece that allows the double trigger set up to work.
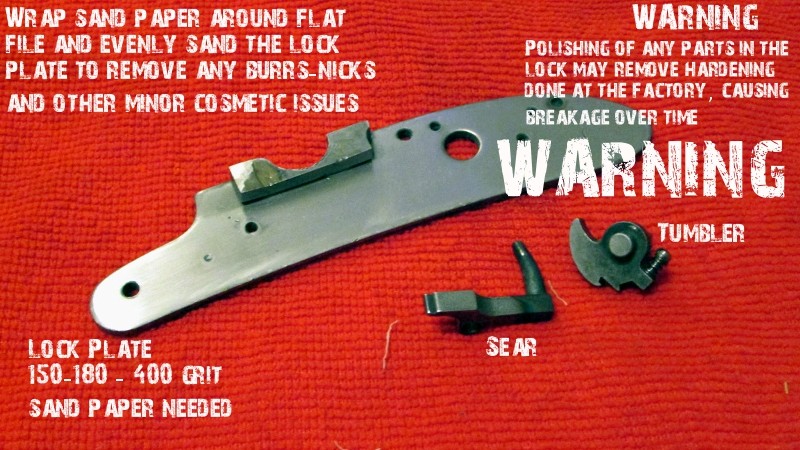
The Lock panel, sear and tumbler are our main areas to pay attention to. Roughness, burrs, etc are the cause of a gritty feeling lock. This lock felt great, but after going through the kit, why the heck not polish up the parts a little bit? I did not go to the extreme of polishing the parts like a mirror, but just enough to smooth out the surfaces and knock down any edges that may be present.
I like to use a flat file and wrap my sand paper around it and gently polish all the flat surfaces first before moving on to anything that's rounded. When I come to rounded parts, I very gently roll that part onto the sand paper, keeping any edge, flat so I do not make something round, that should be flat, or the other way around. Any errors you make on the sear or tumbler can cause your lock to malfunction, resulting in a dirty pair of underwear, injury or death.
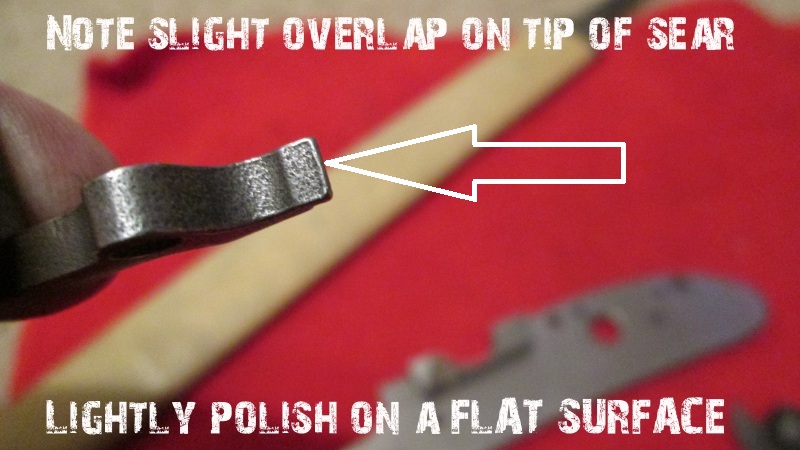
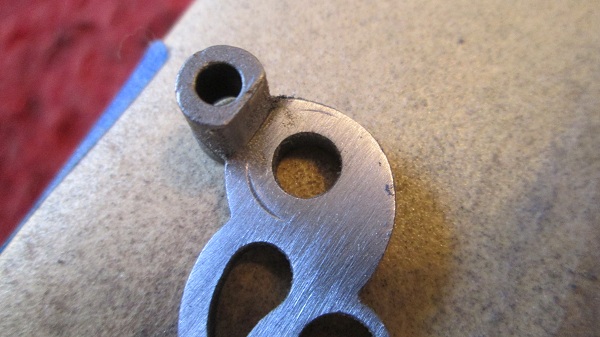
Note the slight edge. This is the stuff we are looking for when we take the lock apart and inspect it for flaws. This is exactly what we are looking to polish out so we have a nice smooth, clean lock when we pull the hammer back, as well as when the hammer falls onto a live percussion cap. Do NOT get over crazy with sanding! This section engages the tumbler and gives of Half Cock "Safety" & Full Cock " Fire at will!" positions. Get to crazy sanding and polishing it, you will thin it out, causing breakage in a short time. Traditions Mainsprings are VERY heavy duty and that added pressure WILL be putting straight on the sear if you thin it out to much.
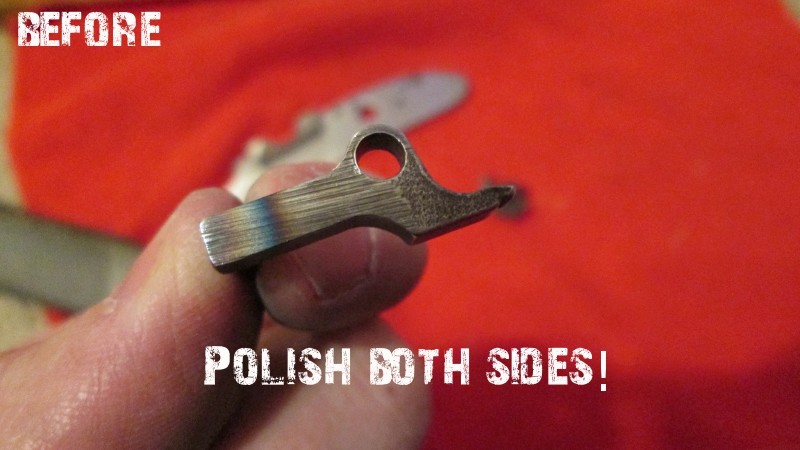
Moving on to the other side of the sear, polish those sides! They rub up against the lock panel and the bridle! Remember, you don't have to remove every scratch or pit mark. Just knock the surfaces down on a flat file with 150 grit sand paper and work up to 400 grit to get the surfaces smooth. Note the purplish blue mark towards the left side, this is the factory hardening treatment I've mentioned to look out for.
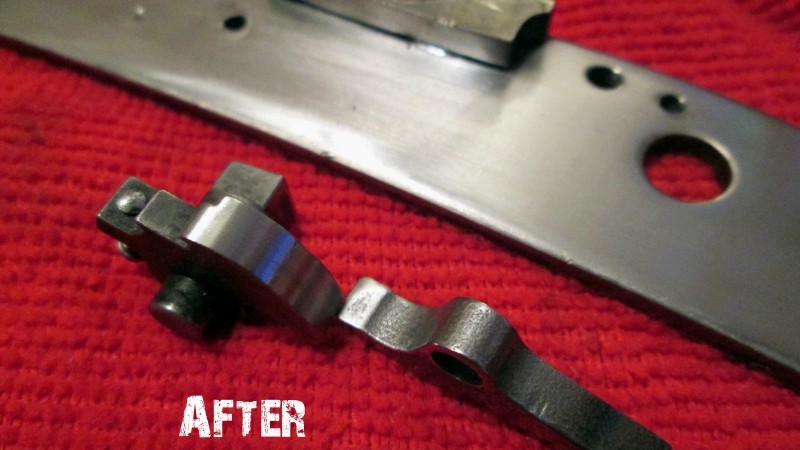
My final polishing project at its end! Now to bag up all the lock parts and brown the lock plate.
Many other areas to note where polishing may need to be done! This lock below had some very rough casting on the tumbler.
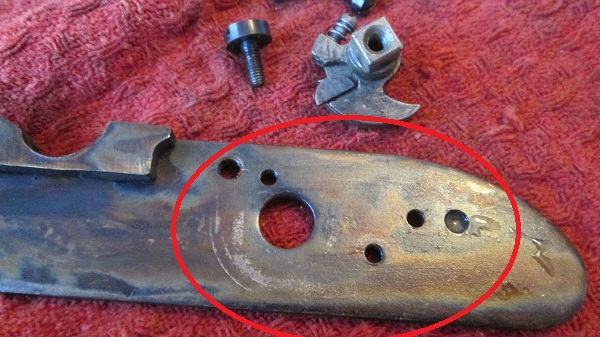
A light polish on the lock plate itself can help smooth things out.
Polishing the bridle and other places that rub against the bridle is also a must.
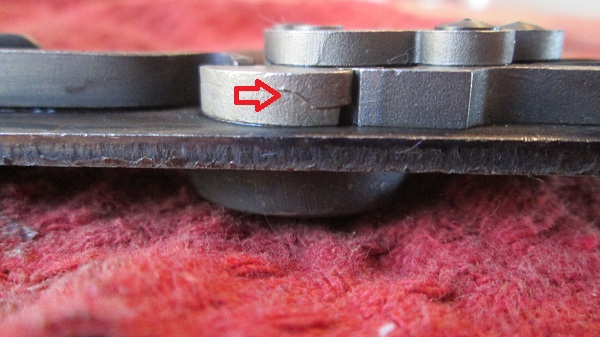
This picture showing a section of the bridle, clearly shows a rubbing issue with this deep scarring. Polish out areas like this along with the part causing that deep scar.
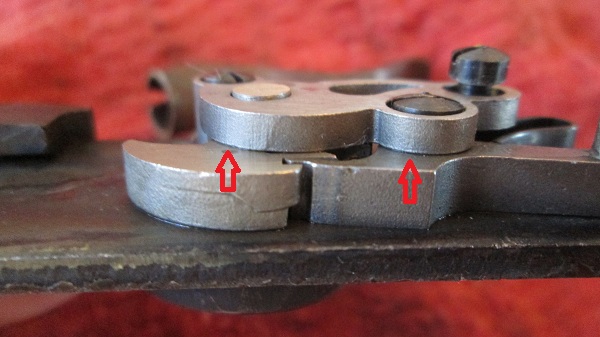
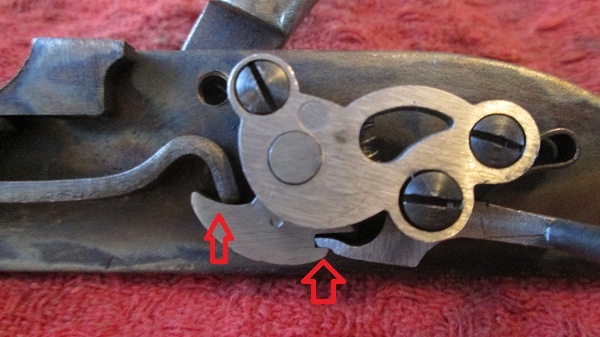
Note the red arrow on the left pointing to the tumbler. We can clearly see the main spring is installed. Polishing the curve of the tumber, where the main spring comes into place will greatly help reduce felt drag.
Now lets move onto the lock! Be very very careful with that main spring guys! It will cause you a ton of pain should it slip from your grasp and fly off at your face or even worse, hit you in the knuckle. I use a small C clamp or heavy pair of channellock plyers and grasp the main spring and gently pull it from the lock plate. Once it has been removed, you can now safely remove the hammer, bridle and remaining lock parts. Be careful that you do not lose the FLY! Its a tiny piece that allows the double trigger set up to work.
The Lock panel, sear and tumbler are our main areas to pay attention to. Roughness, burrs, etc are the cause of a gritty feeling lock. This lock felt great, but after going through the kit, why the heck not polish up the parts a little bit? I did not go to the extreme of polishing the parts like a mirror, but just enough to smooth out the surfaces and knock down any edges that may be present.
I like to use a flat file and wrap my sand paper around it and gently polish all the flat surfaces first before moving on to anything that's rounded. When I come to rounded parts, I very gently roll that part onto the sand paper, keeping any edge, flat so I do not make something round, that should be flat, or the other way around. Any errors you make on the sear or tumbler can cause your lock to malfunction, resulting in a dirty pair of underwear, injury or death.
Note the slight edge. This is the stuff we are looking for when we take the lock apart and inspect it for flaws. This is exactly what we are looking to polish out so we have a nice smooth, clean lock when we pull the hammer back, as well as when the hammer falls onto a live percussion cap. Do NOT get over crazy with sanding! This section engages the tumbler and gives of Half Cock "Safety" & Full Cock " Fire at will!" positions. Get to crazy sanding and polishing it, you will thin it out, causing breakage in a short time. Traditions Mainsprings are VERY heavy duty and that added pressure WILL be putting straight on the sear if you thin it out to much.
Moving on to the other side of the sear, polish those sides! They rub up against the lock panel and the bridle! Remember, you don't have to remove every scratch or pit mark. Just knock the surfaces down on a flat file with 150 grit sand paper and work up to 400 grit to get the surfaces smooth. Note the purplish blue mark towards the left side, this is the factory hardening treatment I've mentioned to look out for.
My final polishing project at its end! Now to bag up all the lock parts and brown the lock plate.
Many other areas to note where polishing may need to be done! This lock below had some very rough casting on the tumbler.
A light polish on the lock plate itself can help smooth things out.
Polishing the bridle and other places that rub against the bridle is also a must.
This picture showing a section of the bridle, clearly shows a rubbing issue with this deep scarring. Polish out areas like this along with the part causing that deep scar.
Note the red arrow on the left pointing to the tumbler. We can clearly see the main spring is installed. Polishing the curve of the tumber, where the main spring comes into place will greatly help reduce felt drag.

