O-Ring In The Primer Pocket

Modern Muzzleloading Forum

Help Support Modern Muzzleloading Forum:

This site may earn a commission from merchant affiliate links, including eBay, Amazon, and others.
The conversions started with the Accura breech plug, because every now and seldom, there would be a hangfire using BH209. This part of the conversion was on the barrel end of the breech plug, and involved installing a vent liner with a larger flash hole, and making a concavity in the same end. When installing the vent liner it was deemed good to enlarge the fire channel also.

Then, it was discovered that from firing many many shots, the primer seat suffered flame cutting, and thus there resulted in a lot of blow back. This led to working on the hammer end of the breech plug with a desire to fix the flame cut primer seat. This was addressed by drilling and shimming the primer seat with o-ring, steel washer, and aluminum washer. Some of the results are better than others.

The Accura is a break action muzzle loader; the Omega is a falling block muzzle loader.

An explanation of the next step to reduce blow back to zero will follow in my next post.
 
deerslayer68

bolt action,colorado legal

If your bolt has a bolt face then it really would be fairly easy to make it 98% blow back free. It is plunger type bolt, they are more difficult to make blow back free. A plunger type action can be forced back by blow back pressure allowing gases to vent from the breech plug.

One other thing if the conversion you bought is from a good company - you could let them know your primer retaining spring broke and they would probably send you another. Breech plug/nipples with a retaining spring are built for the primer to be a bit sloppy in them to ease the extraction of a spent primer.
 
When the aluminum shim in the Omega breech plug failed a few day ago, it was seen that there wasn't enough primer seat left to repair, so a grade 8 bolt was installed to bring material to work on. Information provided by Screwbolts was used to modify the Omega plug. When the aluminum shim in the Accura breech plug failed, it turned out there was enough material left in the primer seat to modify the breech plug to use 0-ring.

Previously i had tried rubber 0-ring, and experienced some grief trying to make it work. Part of the rubber was blown into the flash channel, by the primer, and plugged the flash hole, so i gave up the idea of o-ring. Busta posted and explained there was too much compression on the o-ring, and this along with the taper in the primer seat was why i had problems.

In the days since, i ordered some silicon o-ring, and when the Accura started belching blow back, i decided to give them a try. So, what i did was grind a C drill more flatter.


P3170392.JPG


This flatter drill was used to drill into the primer seat of the Accura breech plug about 0.050". This allows for the o-ring without overly compressing it, and results in a nice nearly flat primer seat. Here is the modified plug next to a 'new' factory plug.


P3180403.JPG


The other end of the breech plugs showing the vent liner from Precision Rifle installed in the modified plug.


P3180402.JPG


The breech plugs with the silicon o-ring installed. The headspace with the o-ring installed was 0.020" less than factory. This results in a nice tight seal between the primer and the o-ring, without too much compression, which results in zero blow back.


P3180404.JPG


Here is what the spent primers from the Accura look like, with the nice tight seal, provided by the o-ring.


P3180406.JPG


Here is a picture of the o-rings. A new rubber ring, and a used rubber ring. A new silicon ring, a silicon ring that has seen 4 shots, and a silicon ring that has seen about 25 shots. The ring with 25 shots on it, is installed in the rifle right now, has 29 shots through it, and is still viable.


P3180405.JPG


Busta' experience and advice regarding o-ring, seemingly has allowed for success. It is actually quite simple to modify a breech plug to accept an o-ring. One needs a C drill, and patience. Approaching the correct depth of drill needs be done with care. Flattening a drill also seems to be a good step, but probably isn't absolutely necessary.
 
Went to the range today. The Accura 45 shimmed plug started getting some blowby but i have really been pushing the limit. Heavy BH209 charges and very heavy for caliber 40s (260gr).

The tan MMP sabots really took a beating but not one blew. I got a super good 100yd group with the Barnes 10mm 155gr TAC-XP, 110gr BH209 and CCI209M primers. I only used the mags since it was a 110gr charge and a light bullet. The combo seems to work great and MMP sabot looked ok too.

Its sub 1", i will post pics on another thread. These would make awesome recoil sensitive loads and penetration rocks. They are screamers!!!!

Added a o-ring to the Accura and its back to spotless again and the oring lasted a good 30 shots,,,maybe could have gone further.

The WinApex though still functions perfect. If you didnt see the dent in the Win209 primer, you would think they are new. I was shooting some 325gr bullets with 100gr and my hardcast .429 200gr spire points with 110grs. I finally found the load this little bullet likes with groups just over 1".

Im a believer. Regardless of which method you choose. You can make an Accura 100% BH209 friendly and 99% blowby free. IMO at this time i feel the o-ring is satisfactory if you dont mind replacing a cheap oring every 30+ shots. Correct primer crush (headspace) makes a huge difference in the Accura and my WinApex.

My WinApex 50 AKA CVA Kodiak has never shot this clean without the head space mod but isnt too bad either with just a vent liner and enlarged flash channel.
 
BuckDoeHunter,

Never heard of such a thing, what is an o-ring? 😉

002.jpg

011-1.jpg


Seriously, I have been doing this for a couple years in a few of my custom and customized factory breech plugs. This was due to the fact that I don't like blowback and am always looking for a "better mousetrap". With the introduction of Blackhorn 209 powder, I wanted to be able to use this powder in my favorite rifle, a NEF Huntsman. I have tested this powder in my Knights, Whites, H&R, NEF, and others T/C's and CVA's. What I found out right away, was that this was not going to work reliably in my standard factory NEF breech plug, or the PR .25 ACP conversion breech plug, even with Small Rifle Magnum Primers. So I had to either find a plug that would shoot it reliably, or find one that I could modify to work 100%.
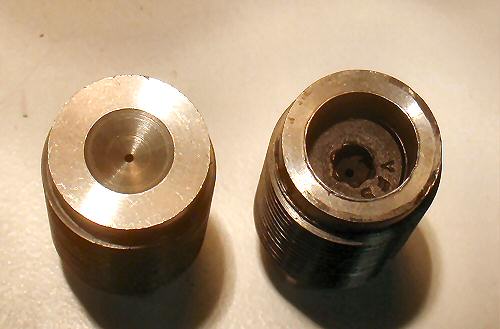
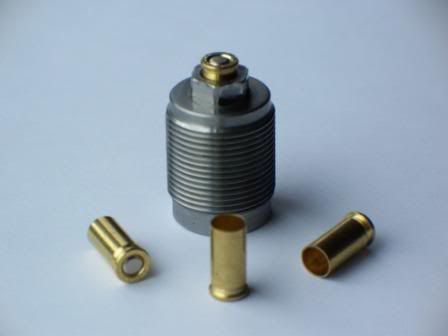
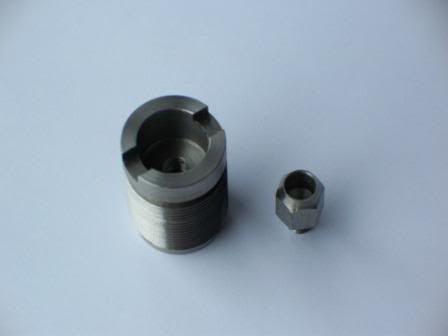
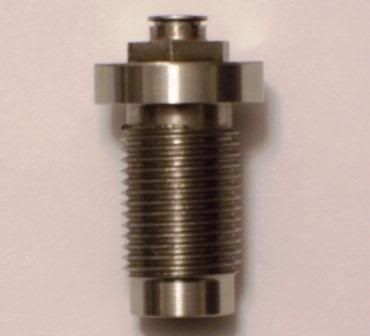
25 acp breech plug.
006-6.jpg


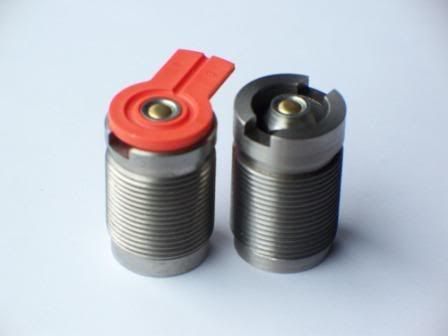
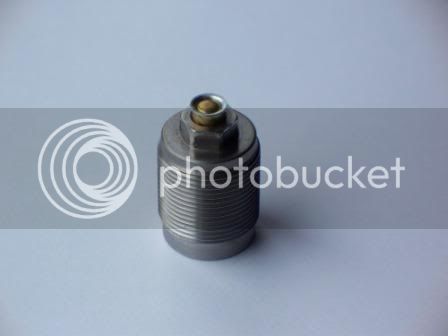
The first custom plug I tested was the Hubbard plug. It worked well, but I was still left with blowback. This plug headspaces off the rim of the 209 primer, and soot bleeds back out around the primer. Iknew I could come up with something that would at least reduce this. Then it hit me, an o-ring in the bottom of the primer pocket would seal the face of the primer. I was very surprized at the results, no blowback. This plug is a two-piece, and really not what I was looking for, as I still had to use the crappy standard NEF breech plug wrench (which I also modified several years ago).

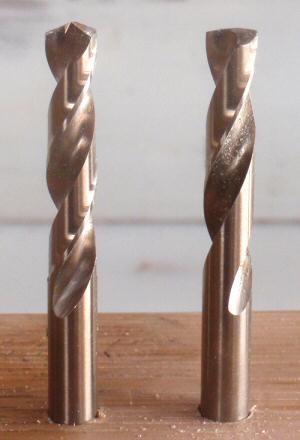
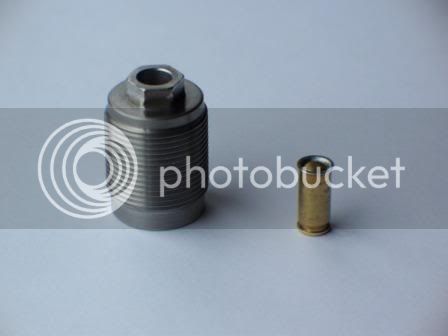
Standard NEF breech plug on left, Hubbard on the right.
012-4.jpg

031.jpg

016-2.jpg


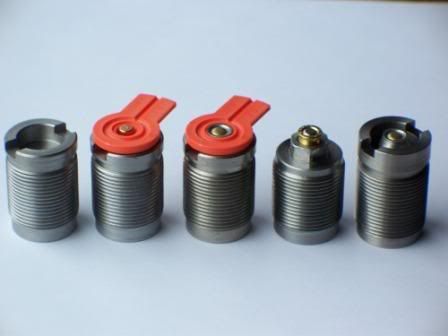
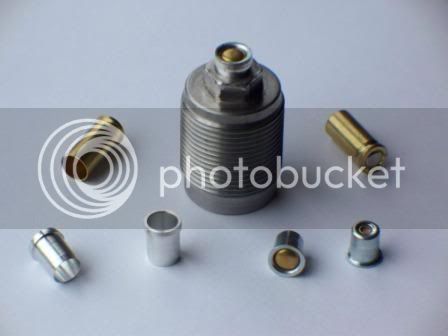
Just a small picture of some other successful mods I have done along the way. Trust me, you don't want to see them all, nor do I have the time to compile it.

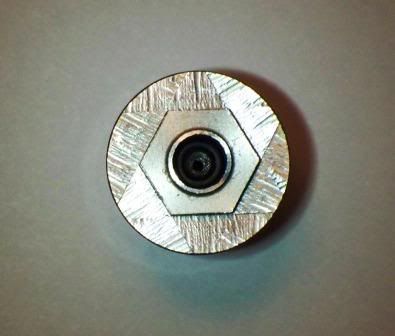
L to R; Standard NEF plug without primer carrier (POS), my custom #11 primer conversion, standard 209 plug with primer carrier, .25 ACP breech plug, custom Hubbard breech plug.
007-7.jpg


This is a uni-bushing .25 acp back to 209 primer conversion.
305.jpg


This is a upside down .25 acp back to 209 conversion. This required turning down the rim slightly, and taking a little off the mouth. This worked very well, but did not conquer the blowback problem, and I had to use the brass.
310.jpg

307.jpg


Then my prayers were answered. Nick contacted me and said that he had a breech plug for a NEF that he designed. He was using this plug in his and his sons rifles. It was a one piece plug, but the only problem was it was of the newer 5/8" variety. My two NEF rifles used the 7/8" thread. So I was on a quest to find me a NEF Sidekick with the 5/8" breech plug, and aquired one. Nick sent me a plug to try, as I was dying to find a plug that I coud just pop a primer in, no muss and no fuss. The plug came and I couldn't wait to test it out with Blackhorn 209. This plug also headspaced off the rim of the primer, so I was concerned that I might still have some blowback with BH209. But first I wanted to conduct some primer tests without a load.

045-2.jpg


I fired it with a primer and knew I would have to tweek it a bit if I wanted to seal out blowback. I then did some measuring and came to the conclusion that I could utilize my o-ring modification in this plug as well. This would help seal the ignition, while providing maximum flame and pressure for ignition.

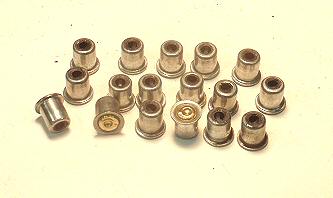
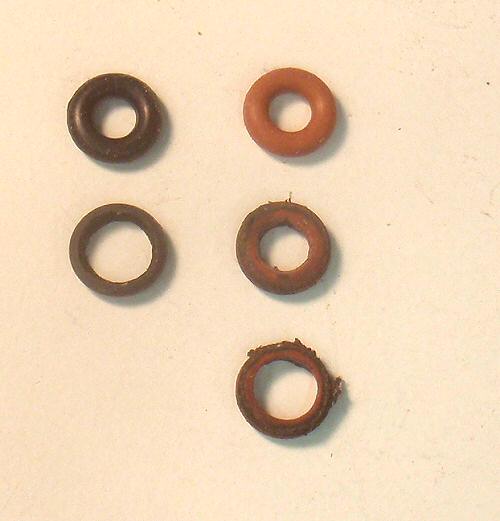
Here is a unfired primer, primer fired with my o-ring mod, and a primer fired without the o-ring mod.
020-7.jpg


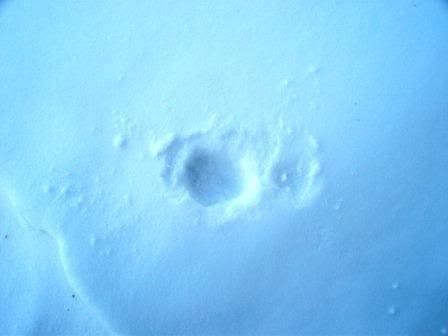
This is an unscientific experiment I conducted over a year ago. I fired two primer through the plug approximately a foot from the snow. Primer with o-ring on left, without on right.
041.jpg


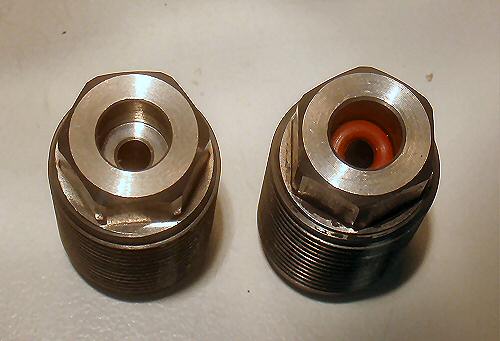
Early prototype MU plug, with my o-ring mod in the primer pocket. DONT LOOK LARRY!
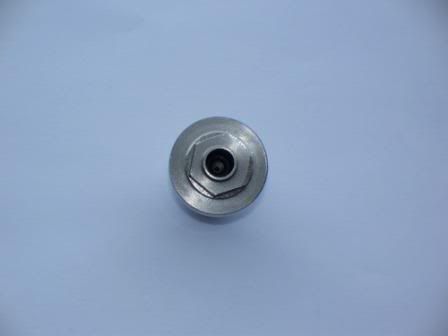
043-1.jpg


Production plug.
011.jpg


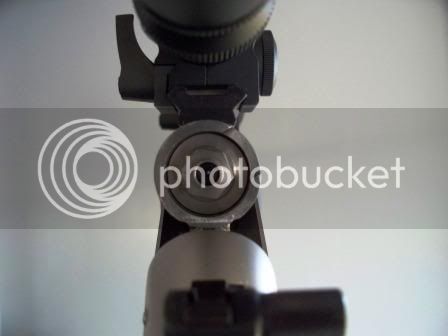
Breech after a range session.
012.jpg


I am running out of time, but to make a long story short. I contacted Nick with my findings and he liked it as well. I was ecstatic when he said he would make the 7/8" plugs, and tried to help as much as I could with that project.

Gotta run! (to be continued)
 
Back
Top